

Phase 2 - Identifying and clipping
Let's first remember our previous post.
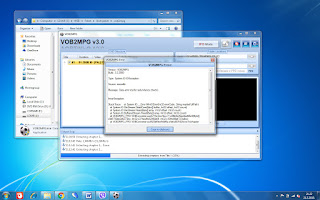
If you get a message like the one on this picture that blocked your transfer, it means that one of the VOB files are damaged.
We will convert the files that were not corrupted with the same application that we use for clipping, so that we can watch or archive the files. I will explain later how to rescue the files and parts of the DVD that were not damaged.
I achieved my basic goal. I emptied my closet without big investment in a relatively easy way. 😰
I copied all the raw materials to an external USB HDD. I used a normal computer hard disk which I was not using anymore and connected it to my computer using a USB to IDE&SATA adapter.
I put these links here so you can see what I'm talking about in case you're not familiar with the subject, and this way you can also see how much money was invested in this whole process 😊
Of course, you can copy and archive one video at the time, which would require much less working space on your hard disk, but if you decide to follow my path and clear out your closet as quickly as possible, you need to determine how much disk space you need for your copied materials.
120 minutes of video copied from a VHS tape requires approximately 4.5 GB of disk space. Similarly, 4 minutes of video transferred from a 8mm tape takes up approximately 147 MB of disk space. In both cases videos were transferred into a MPEG2 PAL 720x576, 25 FPS video format. Different video formats might require more or less disk space, but this setup seemed optimal.
Once I finished all my transfers I ended up with an empty closet 😊 and a hard disk with many video files. I only roughly organized those files, mainly according to year the video was recorded and the main event that was recorded.
My video/photo album will not contain all the materials, but only the selected ones, so I will process only them. Some of the materials are professional recordings of different family events, like weddings, or other videos that were recorded as a whole. I will leave them in their original form, except in cases where they got damaged and require restoration.
For identifying and clipping videos I have found a simple, fast and free software called Mpg2Cut2. You can download it here: https://www.videohelp.com/software/Mpg2Cut2
All the tools that I use for processing and clipping video materials, as well as those that were used to create my YouTube videos, are freeware. Also, all of them except for AviSynth are portable (meaning they require no special installation process). I have gathered all these tools into a single ZIP file called "Start package" which I extracted into the root folder of my C: drive.
If you wish you can download this package from this link (29 MB). On this video you can see a quick tutorial on how to install everything from the Start package. Video is quite short and fast, so if you need to you can pause it to see the details.
The package also contains AviSynth frameserver and some basic plugins. AviSynth is a program that I use to enhance and clean up video clips, and it requires actual installation. All it's plugins should be copied into AviSynth folder. We will go through explanation of each of the tools as we go through our next phase...
Phase 3 - Detailed processing - This is optional, and done only if necessary. This includes cleaning away damage done to the film caused by time, poor equipment, everyday handling or some other causes. You want to get the maximum out of you material.
But more on that in my next post, so for now let's get clipping...

If you get a message like the one on this picture that blocked your transfer, it means that one of the VOB files are damaged.
We will convert the files that were not corrupted with the same application that we use for clipping, so that we can watch or archive the files. I will explain later how to rescue the files and parts of the DVD that were not damaged.
I achieved my basic goal. I emptied my closet without big investment in a relatively easy way. 😰
Phase 2 - Identifying and clipping
I have decided to make a "Time capsule" 😊I copied all the raw materials to an external USB HDD. I used a normal computer hard disk which I was not using anymore and connected it to my computer using a USB to IDE&SATA adapter.
I put these links here so you can see what I'm talking about in case you're not familiar with the subject, and this way you can also see how much money was invested in this whole process 😊
Of course, you can copy and archive one video at the time, which would require much less working space on your hard disk, but if you decide to follow my path and clear out your closet as quickly as possible, you need to determine how much disk space you need for your copied materials.
120 minutes of video copied from a VHS tape requires approximately 4.5 GB of disk space. Similarly, 4 minutes of video transferred from a 8mm tape takes up approximately 147 MB of disk space. In both cases videos were transferred into a MPEG2 PAL 720x576, 25 FPS video format. Different video formats might require more or less disk space, but this setup seemed optimal.
Once I finished all my transfers I ended up with an empty closet 😊 and a hard disk with many video files. I only roughly organized those files, mainly according to year the video was recorded and the main event that was recorded.
My video/photo album will not contain all the materials, but only the selected ones, so I will process only them. Some of the materials are professional recordings of different family events, like weddings, or other videos that were recorded as a whole. I will leave them in their original form, except in cases where they got damaged and require restoration.
For identifying and clipping videos I have found a simple, fast and free software called Mpg2Cut2. You can download it here: https://www.videohelp.com/software/Mpg2Cut2
All the tools that I use for processing and clipping video materials, as well as those that were used to create my YouTube videos, are freeware. Also, all of them except for AviSynth are portable (meaning they require no special installation process). I have gathered all these tools into a single ZIP file called "Start package" which I extracted into the root folder of my C: drive.
If you wish you can download this package from this link (29 MB). On this video you can see a quick tutorial on how to install everything from the Start package. Video is quite short and fast, so if you need to you can pause it to see the details.
The package also contains AviSynth frameserver and some basic plugins. AviSynth is a program that I use to enhance and clean up video clips, and it requires actual installation. All it's plugins should be copied into AviSynth folder. We will go through explanation of each of the tools as we go through our next phase...
Phase 3 - Detailed processing - This is optional, and done only if necessary. This includes cleaning away damage done to the film caused by time, poor equipment, everyday handling or some other causes. You want to get the maximum out of you material.
But more on that in my next post, so for now let's get clipping...

